 用APP打开
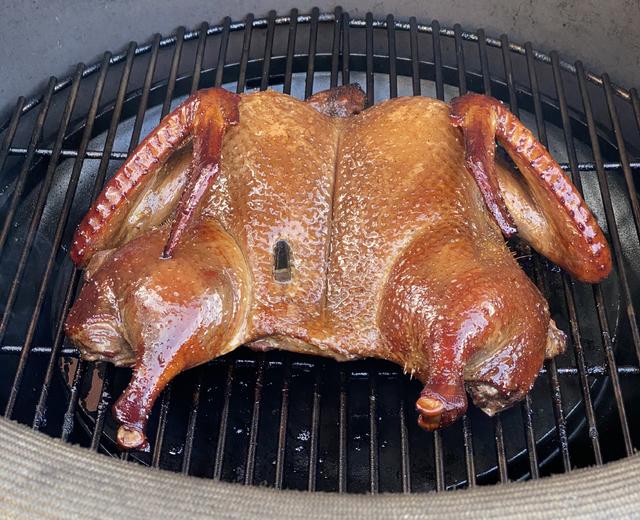
烧鸭/烧鹅/熏鸡翅/熏鹧鸪 (Smoked spatchcock duck/goose/chicken wings/partridges)

用料
烧鸭/烧鹅/熏鸡翅/熏鹧鸪 (Smoked spatchcock duck/goose/chicken wings/partridges)的做法步骤
Use a small pot (5cup pot), place all marinade ingredients listed above excluding the ice, bring the mixture to a simmer then simmer on low heat for 5min. Allow the liquid to cool completely - or add ice to it to cool just before adding marinade to bird. Meanwhile, blow skin up for duck or goose. Spatchcock makes duck more tender but skin will not blow up so manually separate from meat layer but take care to keep skin intact. Place bird flat in sink exposing most skin. Pour boiling water to burn skin once, the skin shrinkage under water will be strongly visible, especially if spatchcocked. This is a key step. Prick the duck skin all over using a metal stick. Cut off the butt part and remove the fatty tissue on the two sides just inside the butt if it’s a duck or goose. Butt will stink when cooked if not removed but it does not affect flavour.
Inferior but popular alternative marinade methods (not as tasty as wet marinade method but my records): blend dry spices into powder and rub duck inside and out.

Leave duck/goose /large game birds to marinade for 48 hours. Leave chicken wings and small birds such as partridges to marinate for only 24 hours maximum, 12 hours would be sufficient, or meat will be too salty.
Place duck in the marinade in a sealed bag with all air removed. This works better than a pot as the marinade has maximal exposure to all duck surfaces. Leave in fridge for overnight or better 48 hours.
If want to have duck for lunch, next day first thing in the morning, take out duck and dry thoroughly with kitchen towel. Discard the marinade water. Place the duck on a wired rack in an airy space (under extractor fan, open window etc) to air dry for 1-2 hours.
Baste the duck inside out with the basting mixture (rice vinegar+red vinegar 2tsbp, 1tbsp honey 1tbsp hot water). Leave to stand for 1 hr. repeat the process at least once, and leave to stand again. Make sure the duck has air dried before baking or it will burn.
Place duck breast side up on a wired rack which is then inside a large metal oven tray lined with foil. On the foil, place the turmeric and rosemary from the vegetable side ingredient list. The oven tray will collect the duck fat for roasting the vegetable sides later. The turmeric and rosemary can infuse in the fat first.
Preheat oven to 175C. Place duck breast side up, in the middle or bottom level without touching any oven sides. Time for 8-10min. Then take out the duck, wrap the wing tips and the bone part of the legs with foil to prevent it from burning later.
Place back in oven still breast side up for 30min (time is for large barbary duck. 15-20min if wild duck). Take out duck, prick the duck all over with sharp metal stick (the metal meat thermometer is a good tool here). Check meat temperature (165F is cooked).
Remove the duck from the rack. Place the pre-boiled potatoes, garlic and Brussels sprouts on the tray. Place the wire on top and place duck back with it turned over (breast side down)
Turn the duck over (tummy side up, breast side down). Back in the oven with the veg at the bottom, at 175C for 20-30min (barbary duck here; if wild duck which is much much smaller, go for 10-15min). Check at 15-20min, prick all over again. Check meat temp is 165F. When tummy is browned and meat is cooked, turn back to breast side up, turn oven to 200C and place back in oven to brown the top properly: 3-5min, WATCH the duck at this step, don’t walk away, let it brown but don’t let it burn..
Place a tea towel on a chopping board. Put on it a long piece of foil (long enough to wrap duck) Take out duck and place duck on foil, wrap duck with foil, then with tea towel. Leave to stand for 10min to let the meat rest.
Carve and serve! :)


")


")
